Smaller Mulberry Cabinet

I find it helpful to make something more than once in the hope that I might improve the product and speed up the build as the incarnations progress. This project is a repeat of the 3 drawer cabinet in my last post. Only smaller - and I made the cabinet first this time, then made the drawers to fit.
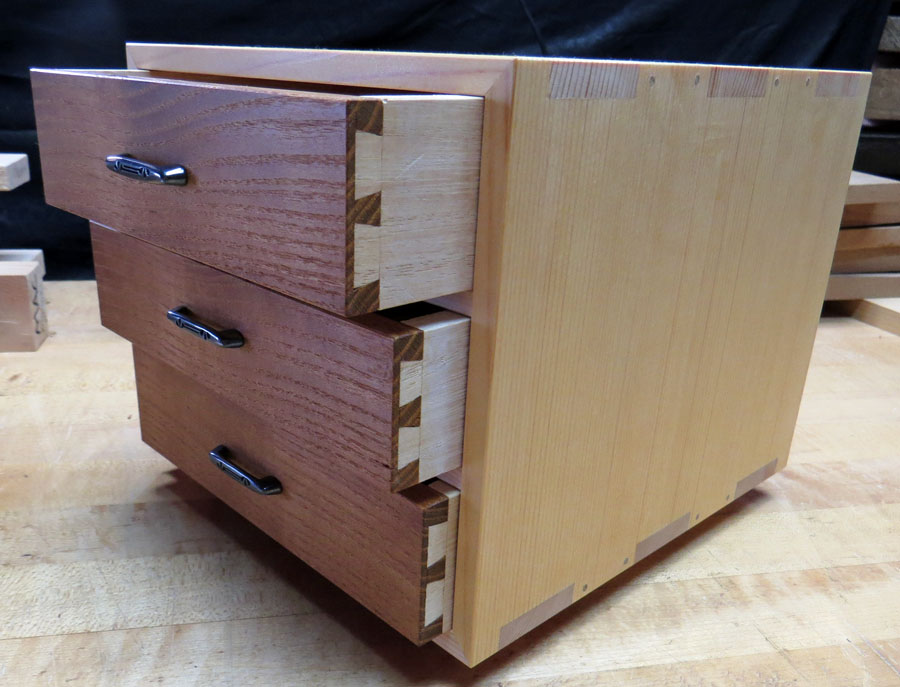
Since the case itself was to be thinner material (8mm thick) I did not want to fiddle with blind mitered dovetails, so I opted for a conventional (in the tansu making world) box joint, also called gomai-gumi-tsugi according to Heineken. I added pegs and mitered the ends to allow for my back panel groove.

Besides the case joinery differences, the case wood is Kiso hinoki that I picked up in Shinkiba, Tokyo a while back. I had not worked hinoki before so that presented its own challenges. It is softer than Port Orford cedar and really demands sharp tools and great care in handling the wood throughout the project to avoid damage. I does have a nice fragrance, the quarter-sawn pieces have straight, tight grain, and it is easy to work. It dents and crushes mercilessly, but it is very flexible and not prone to splitting or cracking. It is prone to highlighting poor joinery - like the miters shown here.

The overall dimensions of the case form about a 20 cm cube. The bottom has two rails running front to back that lift it about 1 cm. Like the last project, the solid shelf dividers are full depth and fit into grooves in the sides. There is a rear panel that floats (not rattles around) in a groove on all four sides.

Drawers are solid mulberry fronts, paulownia sides and back, and hinoki bottoms. The bottom of each drawer is set in a groove on all 4 sides. Grain runs across the drawer - not typical of tansu drawers.

Handles are silver plated brass from a specialty shop in Tokyo. Each end of the handle has a malleable wire about 2 cm long cast into the handle. Each wire is fed through a drilled hole in the drawer face and protrudes about 1cm out the back. In this case, I carefully coiled the wire and pressed it against the back of the drawer so it would not leave a sharp end sticking out - and likely to draw blood from the user of the drawers. This approach holds the light loads on the handle. There are other ways to do this...


Comments