Blind mitered finger joint boxes

So far I have built 4 boxes, starting with conventional finger joints. When made by hand, finger joints are not easy to make without gaps someplace. First 2 boxes highlighted this perfectly, wouldn't you say? Also, if you are not into sanding, and I am not, getting flush finger joints without gouging the planed sides is a skill I am not likely to master. So I abandoned open finger joints for blind ones.
 |
| Box No. 1 - about 2.5" all around |
 |
| Box No. 3 or 4. Probably more fingers than necessary... |
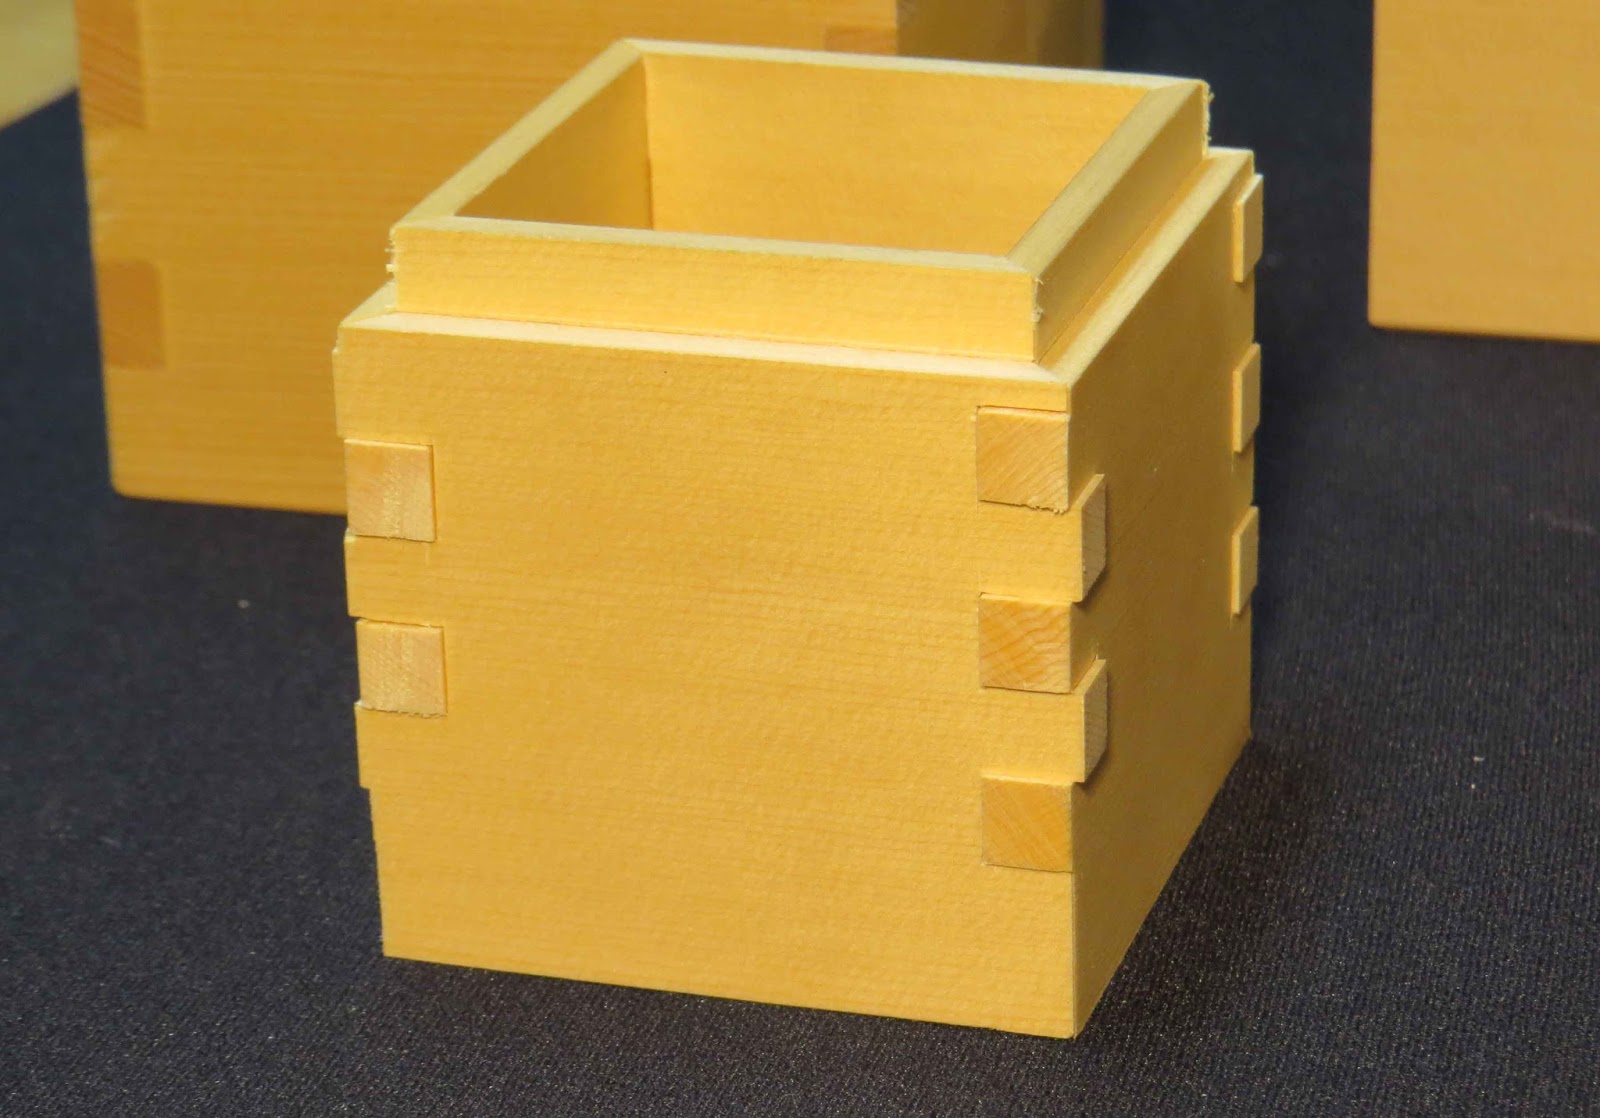
But let's look at the later efforts. These below use blind mitered finger joints in order to provide strength and glue area. The mitered corners look a lot cleaner (or should), do not require high-risk post-assembly trimming, and allow for that wrap around grain I like.
 |
| Box No. 4 |
 |
| Box No. 3 |
In this case, I used a very clean piece of 6+ inch wide Alaskan yellow cedar scrap that I had from an earlier job. I resawed it to 3/8", planed it flat and parallel, then finish planed it as well as I could. I mean "finished planed" because they are not touched again. So take care not to scratch or ding them. Final thickness was .300".
Next I squared 1 edge, planed the opposite edge parallel within a few .000's. The piece was about 12.5" long so I could plan for 4 sides at 3". Top and bottom were cut from thinner stock later.

For the lid and bottom grooves, I chose to groove the main board before cross-cutting the individual sides. This way all grooves line up and you are not left trying to groove a tiny piece of wood. However, planing cross grain with grooves means risk of splintering, so I fill the groove with close-fitting scrap before planing the end grain. Real reason I fuss over the end grain is because I next use it as the references for scribing lines for crosscutting (at 3") and the fingers themselves (at .300 in this case-to match board thickness). This can be done other ways, no doubt.

So for later boxes I wanted to try doing the grooving and final assembly before cutting off the lid, and then add a thin strip around the inside perimeter of the box so that it protruded above the box side enough to fit the lid and keep it in place. Results were mixed. Lid/box alignment improved, but severing the lid from the box after glue up is tricky.
 |
| Example of strip that is added later for lid fit. |

Blind dovetail or finger joints require that you hit a lot of angles and dimensions precisely. A few simple jigs helped improve results a lot. One is just a carefully squared block of oak used to guide the chisel blade (keep it vertical) as you trim the sides of the fingers. Another is a precise 45 degree oak block for trimming the miters. I found that clamping it and the workpiece (carefully positioned) to the bench resulted in precise angles.

One ongoing problem is that the boxes are not perfectly square and therefore require the marks to tell the user how to align the lid with the box. They are not off by much, but trying to get interchangeable parts from hand processes takes a lot of practice. I will keep at it.


Comments
I keep returning to your posts, this one especially, for inspiration and guidance in doing my own AYC box construction. Thank you for such well-written and photographed articles.
I suspect much of the 'not perfect' work you mention is due to the Lilliputian size of the pieces--definitely a lesson in precision for larger workmanship. It is proportionally quite charming.
Bruce
Sorry to take 6 months to respond. Been busy working on a house I wanted to move into in a hurry. I hope your AYC box work is coming along. The AYC keeps us honest because it gets damaged easily and shows every misstep we make. I think it is very good practice for working cleanly. No chips on the bench, no dull tools, no parts dropped on the floor, no clamp marks, no sanding, etc. As usual, the layout (and sharpening) takes longer than the woodworking.