Salvaging a molding plane blade set

The ginnan-mentori-kanna that I wanted to use for a 6mm diameter corner bead was sitting in pieces for months in that essential workshop container - a plastic beer mug. The former kanna owner had lost the blade geometry and shattered the chipbreaker blade tip, so the blade set had to be reshaped and fitted. The dai needed minor truing. Just like any western molding planes, the sharpening can be challenging. Here is where I started:

Start with the main blade as usual. In lieu of bluing, I used a permanent marker to put ink on all the blade surfaces near the cutting edge. Then I inserted the blade into the dai and seated it so that it protruded from the bottom of the dai enough to allow me to scribe a fine line all the way around the blade that traced the contour of the dai surface - in this case 2 bevels and the curved section.
Once the lines were visible I pulled out the blade and prepared my bench grinder (gasp). This blade and chipbreaker are carefully hardened and tempered steel. Make sure you dress the grinding wheel so it is true and sharp. Make sure it is not a crappy wheel or too fine a grit or you will overheat and ruin the blade. Then get a pot of water right next to the grinder. Then figure out how you are going to grind to the lines you scribed. When that is all ready, you may turn on the grinder and lightly, slowly grind off the offending material, dipping it into the water every 5 or 10 seconds. Again, light touch, lots of dipping. Or if you have a wet grinder never mind the dipping.
So lets say you ground to your scribe lines. You now have zero clearance angle on any of the surfaces. To create those clearance angles and put a nice edge on the blade I switched to waterstones. I had to round over the corner of a coarse water stone to get the "cone" close to final contour. I found that a 1/4" untempered steel pin with diamond paste (>15 micron) or other handy abrasive dust and oil or water, spun in an electric hand drill will do a decent job putting a finish on the conical surface. I even ground a cone into 1/2" diameter mild steel rod and spun that but the 1/4" straight rod ended up working better for the final finish. Once you think you have it sharp, put it in the dai and try to plane with it. If your clearance angles are not sufficient, you will find that the full contour will not be cut and the blade will not track uniformly.
 |
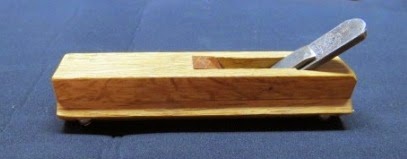
| After much work... |
 |
| The only points of contact. |
After fussing with the positioning, clearances, and rails on this plane I was able to get a satisfactory result, even in elm.


Comments