Tsuitate - Part III - conclusion
 |
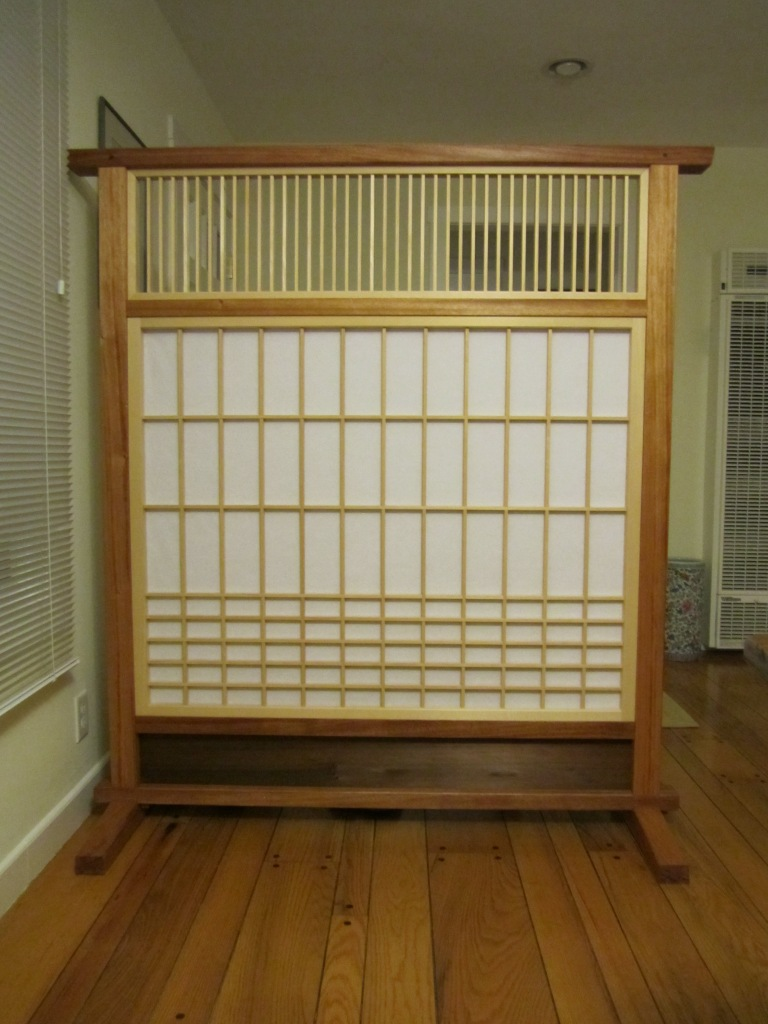
| Tsuitate - bench not included. |
At long last the journey is over for this free-standing shoji screen (tsuitate). Since the last blog post the tasks required included making feet, tenon prep, making wedges and pins, trimming the top and bottom stiles, chamfering all corners, papering the shoji screen, and lastly finishing the frame. The shoji and top grid (Port Orford Cedar) received no finish once planed. The hipboard is old-growth redwood that did receive finish to protect it a bit.
Feet:
The feet were cut out of parts the same size (cross-section) as the posts and are purely functional in this case. They are through mortised and a square hole for a set of opposing wedges was made. The post tenon was also through-mortised for the wedges, but with a 2mm offset so it would pull the post to the foot when the wedges were driven in. The wedges (versus a straight pin) allow you to tighten the foot later if needed. The overall length of the foot is 56 cm - about 1/3 of the 168 cm height. While I would not put this in a breezy spot, it is quite stable on a hardwood floor. Authentic tsuitate typically are smaller and have heavier, often sculpted feet.

Tenons:
The double tenons on the stiles that hold the shoji panel are wedged in order to flare each tenon into the shape of a dovetail. The mortises are flared to accept this expansion. Once the wedges were driven in, the protruding tenon ends were cut off with a flush-cut saw. These cuts were then pared with a chisel. This was done after the finish (Watco Danish Oil) had cured on the posts, so the tenon ends needed finish last.

Finish:
I did not think a full varnish finish was required and Watco looked well on the samples I tried so I went with the instructions on the can. The frame could not be finished while assembled due to the presence of the unfinished Port Orford Cedar grid at the top which was to receive no finish. The surface prep was planed-only, no sanding. On this wood that means some rough patches but I put the time in with a sharp kanna (plane) and the surface was decent. After the first coat of Watco dried (48hrs) I used 400 grit wet/dry sandpaper with more Watco to wet sand all surfaces. Then I applied coat 2, waited, and wiped. And wiped. The redwood hipboard only got a single coat and no sanding. It soaked up the oil rapidly but looked well protected once dried. It is likely to get kicked and splashed so it needed some protection. It is dark now but it will lighten over time.
Shoji paper:
Hida Tool Co. in Berkeley, CA had a roll of inexpensive shoji paper that was 97cm wide and even came with a packet of glue. Too bad my screen's smaller dimension is 100cm. So I cut a strip to cover one of the wider-spaced "cells" and overlapped the paper on the top-most horizontal kumiko. I had the expert help of Jay van Arsdale during this operation, but it took two of us to apply the glue to all kumiko and then lay down the paper before the glue dried. This was a lot of kumiko and a relatively large piece of paper. You only get one shot at aligning it properly so do a dry run first and use masking tape to fix the location of one edge. Then use that taped edge as the hinge to bring the paper down onto the kumiko. Once the glue dried we misted the paper with an atomizer to tighten up the paper. With the paper on you need to minimize handling. It is very fragile.
Conclusions:
Overall this screen will serve it's intended purpose but next time I would make the top grid shorter and the hipboard taller to strike a better visual weight balance. And African Mahogany will not be on my short list for this sort of project in the future. It was a battle the whole time. And some will have issues with the contrasting woods. I don't disagree but over time the POC will darken and the A.M. will brown some and the redwood will lighten. Time will tell.
Comments