Sukiya gate model


Materials: This is from scraps of old growth redwood. Stable, straight grain - good for small scale lumber. I have copper tape that would simulate the copper shingle roof I was considering for the real thing, but I left the copper off the model. Many gates are built with copper caps covering all beam ends and copper bands at and below ground level to protect the wood at greatest risk. The other issue is that 90% of gates of this style have sliding doors, not hinged doors. Typically a brass or steel track is cut into stone in the threshold. But this would be custom stonework and metalwork in the U.S. Maybe you know a good way, or go with hinges.
Process: Only machine used was a hand drill for the mortises in the base. So I had to go into production milling 1/10 scale lumber. To do that I did a lot of ripping, some splitting with a kebiki (marking gauge with blade), and I created a dimensioning fixture for a 70mm plane (kanna). The fixture allowed me to create different thickness stock by using different thickness shims. The kanna rides in two rabbeted, parallel rails and shaves off the top of the stock until it is at dimension. There is a stop at one end of the fixture, the top of which is just below the fixed cutting level. You still need to straighten and flatten and square two sides first, but then you can use the fixture. Long pieces will require a longer fixture and shims - or some other method altogether, but for short stuff this works. Do the rough planing with a separate plane that takes a bigger cut until you get close. Do this because the plane in the fixture is not set for a heavy cut. It is set for a finish cut.
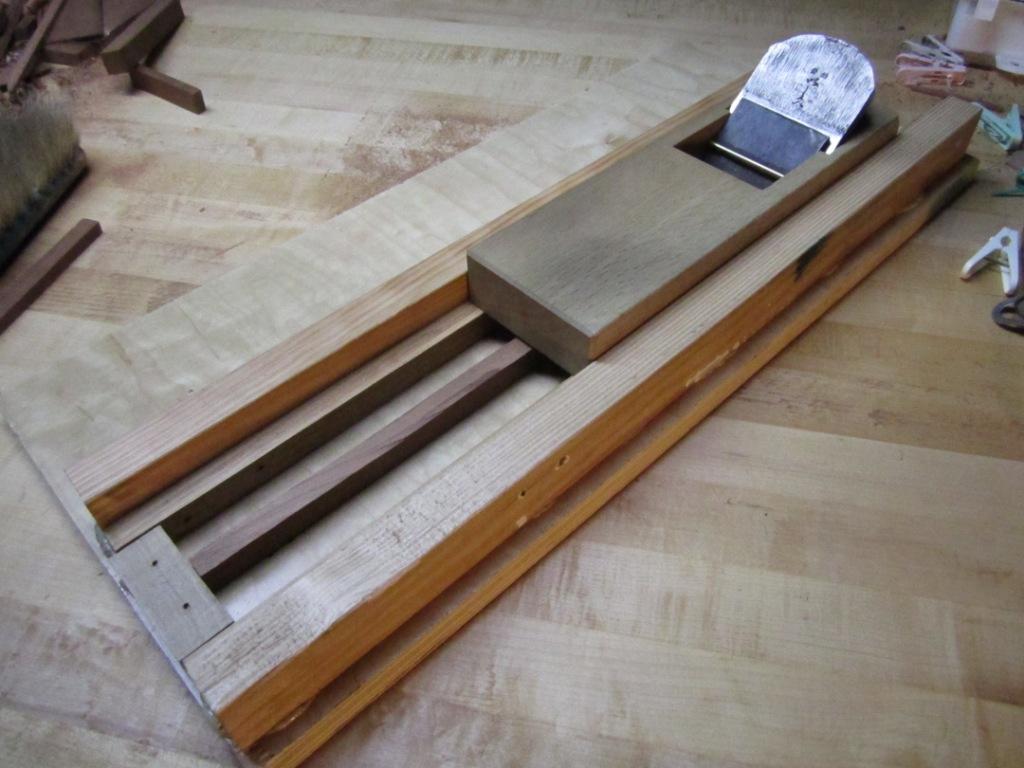 |
| The dimensioning fixture |
 |
| The shims for making different thicknesses. |
 |
| Pieces being planed to final thickness in a batch. |
Conclusions:
- Gorilla Super Glue is no good for rapid dry wood model assembly. Worse than Titebond II in my 45 degree garage anyway. Try something else.
- Take great care in laying out the spacing of the rafters and the main posts because the main posts need to fit between rafters - or maybe not in your case. Best to do a precise scale layout.
- Layout roofing members to support your chosen roofing material.
- As usual, get all your hardware in hand before finalizing your design.
Comments